
For the first time ever, I'm attempting a sewing tutorial.
I'm making a million of these at the moment for teacher gifts and Christmas gifts for the family.
Sew....here we go...
Hang on for the ride and let me know if I slip up anywhere!
1. Find 2 contrasting fat quarters (pre-cut fabric pieces that you'll find at any good fabric or craft store).

2. Iron both pieces.

3. I use a squirt of water for stubborn creases.

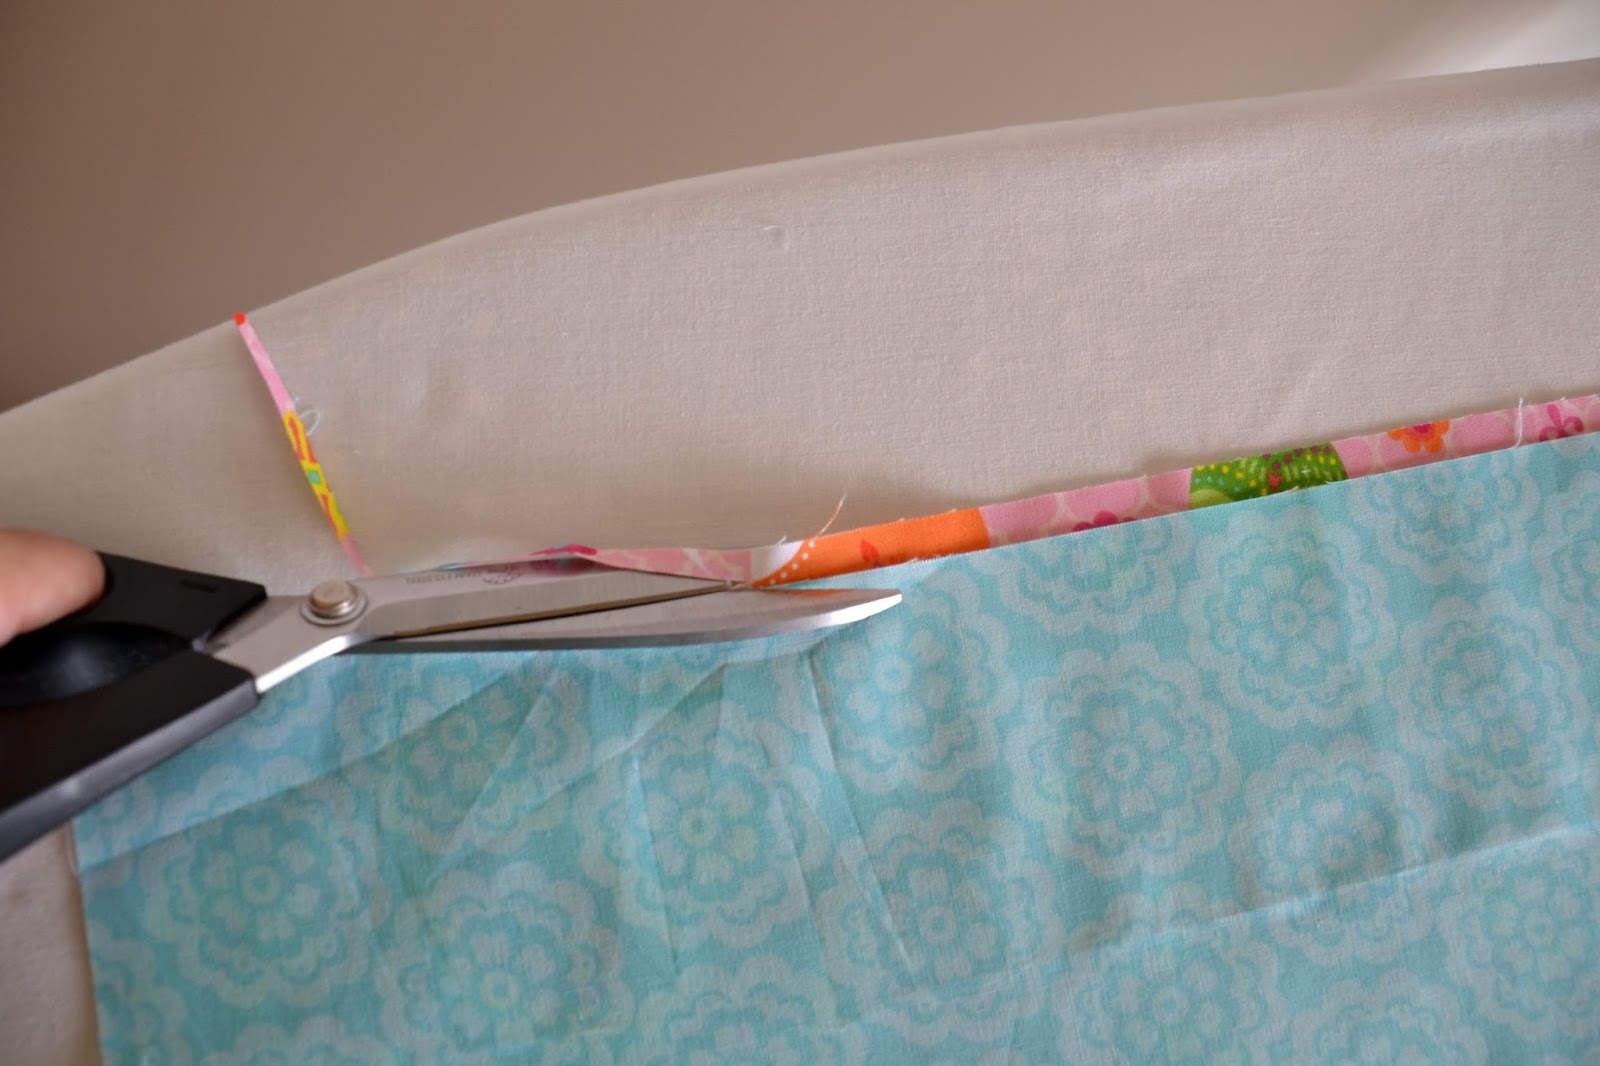
4. Place one piece over the other and trim off any excess to ensure both are the same size.
*Yes, I am a leftie, don't be too freaked out!*
5. Keeping both pieces together fold in half so the short edges are together. Cut a 4½ in (11½ cm) strip and a 4 in (10 cm) strip.

6. Take one of the 4 in (10 cm) strips to make a strap. Press in half lengthwise.

7. Open it up and press one edge to the middle fold-line.

8. Turn it around and do the same with the other edge so you have both edges pressed to the middle line.

9. Fold it all in half again and give another press.

10. Edge stitch the folded edges together.

11. And then edge stitch the other edge of the strap.
(Repeat steps 6 - 11 with the second 4 in (10 cm) strip to make 2 straps.

12. Take one of the large sections and the contrasting 4½ in (11½ cm) strip. Place long edges together.

13. Stitch together using a ¼ in (½ cm) seam.

14. Press open...

making sure the seam is facing the bottom edge.

15. Fold in half with right sides together and make sure the seam you have sewn is matching.

16. Sew the long edge and bottom together with a ¼ in (½ cm) seam.

17. Clip corners.

18. Turn right side to outside and press the seams flat.
(Repeat steps 12 - 18 with the remaining 2 sections of fabric)

19. Take one of the bag pieces, fold it in half lengthwise, and make a small snip halfway along on the top open edge through all 4 layers.

20. Centre the strap ends over the snips taking care not to twist the strap and pin.
Do the same with the second strap on the other side.

21. Machine baste (using your longest stitch length).

22. Turn one of your bag sections inside out and place the other one inside it.
Keeping raw edges together and matching the side seam, pin and machine stitch using a ½ in (1 cm) seam.

23. As you are stitching around the top, use your longest stitch between the handles on one side only.

24. Only for the section between the handles where you used the long stitch, press both sides of the seam back with your iron.

25. Then unpick the long-stitched section with a seam ripper to make an opening and turn both sections right side out through the opening.

26. Push one section back inside the other and edge stitch around the top, stitching the opening closed as you go.

And there you have it...a totes reversible mini tote!

Try to stop at just one...I couldn't!!
