Showing posts with label craft. Show all posts

Wednesday, February 6, 2013

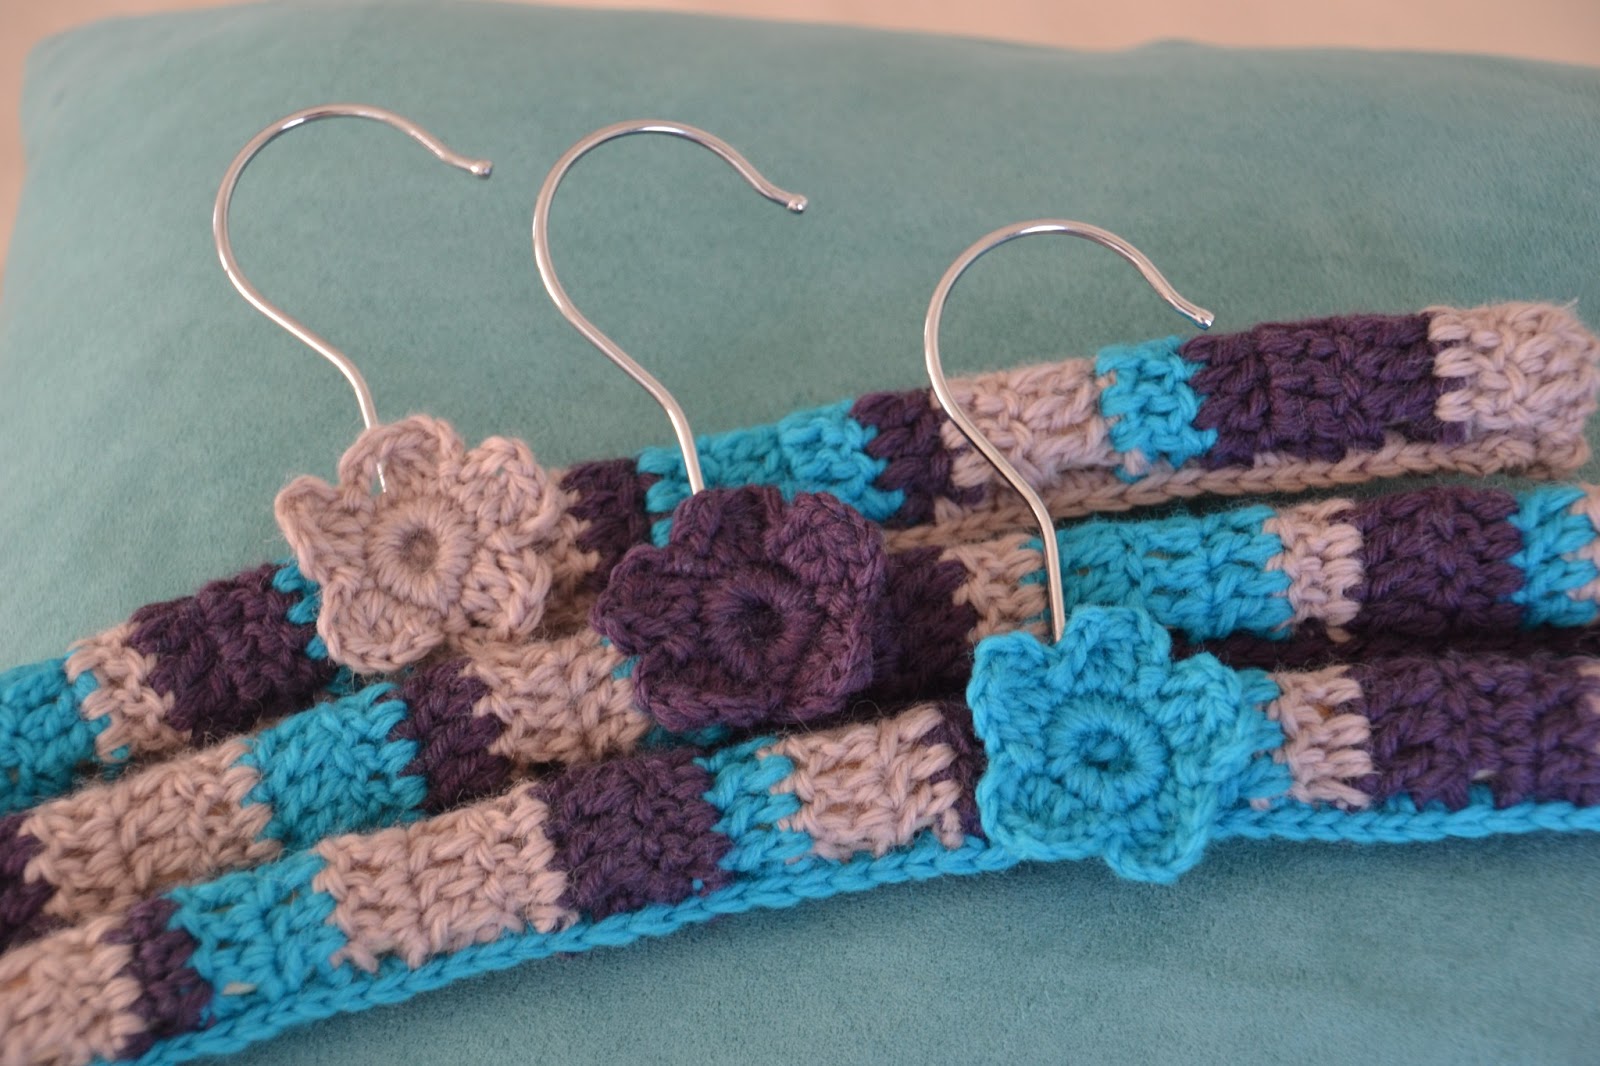
Covered Coat Hangers


I've been very busy lately making these for our school fete next month.
Which ones do you like best?
I've still got 8 to make...then I'm doing hanging hand towels.

I'm thinking I might make some of these for my Made It store...


Linking up today with

Trish @


for Wordless Wednesday

Thursday, December 3, 2009

Fabric Covered Christmas Decorations

These are really pretty, and they have a vintage feel to them.  I made them 20 years ago...time to make some more I think!


What you need -

foam balls
Christmas fabrics
butter knife
fine cord
sequins
pins

What to do -

  • Indent 2 lines all the way around each ball to make quarters with the blunt knife.

  • Cut fabric in this shape just big enough to cover each quarter of the ball.
  • With the edge of the knife, push the fabric into the indentations you made until the edges disappear (cut away any excess).
  • Do this for each quarter using a combination of fabrics.
  • Wrap the cord around the ball (as you would around a present, twisting at the bottom).
  • Secure the bottom twisted cord with a pin through a sequin.
  • Make a loop at the top and cut the ends, use another sequin and pin to secure them at the top.
  • Make heaps and hang them everywhere!

Felt Photo Christmas Decorations

What you need -

felt squares
paper templates
craft glue
scissors
knitting cotton or fine metallic cord
large eye needle
photos

What to do -

Pin paper template shapes (I used hearts, stars, bells and balls) to 2 layers of felt.
Cut out pairs of shapes.
Find something round to trace around (a large glue stick is a good size) on one of the shapes of each pair.
Carefully cut the circle out.
Cut the photos to slightly larger than the holes.
Glue behind so the felt shape becomes the frame.
Place the pair back together and using the cotton or thread, running stitch around the edges leaving enough length to tie ends together.
Hang on Christmas tree, on door knobs, anywhere...

Painted Christmas Tree Balls


What you need -

Foam balls
Metallic paint
Glitter paint
Ribbon of your choice
Star sequins
Pins

What to do -

  1. Paint foam balls on one side, allow to dry.  Paint the other side.
  2. Paint in the same way with glitter paint.
  3. When the balls are completely dry, wrap the ribbon around the ball, twist like you're wrapping a present and bring ribbon up to the top, make a loop and secure with a pin through a star sequin.  Also secure the twisted ribbon at the bottom with a pin through a star sequin.
  4. Randomly place a few more stars with pins on the ball and one in the middle of each ribbon section.
  5. And, you're done!
  6. Hang on the Christmas tree, or anywhere that takes your fancy.

Wednesday, November 4, 2009

Baby Mobile


I made this for my baby girl's room just after she was born.
It's easy and looks so gorgeous in her room.

To make it you will need -
1 wooden circle frame
1 small ring (plastic or metal)
3m cord
4 felt squares of different colours
shape patterns 5-6cms (I used stars, hearts & flowers)
craft paint
craft glue
wadding
knitting cotton
string
large eye needle
(I found all of these things at Spotlight)

  • Paint the wooden frame with a couple of coats of craft paint.
  • Cut the cord into 3 x 1m lengths (use sticky tape to stop ends fraying).
  • Cut 2 of each shape from each felt colour.
  • Glue the dot shapes to the centre of both sides for the flower shapes.
  • Chose the six shapes you wish to use as the bottom level.
  • Using the knitting cotton and needle, sew close to the edges using running stitch.  When a small opening remains fill with a little wadding, put the end of the cord inside the shape, then stitch the gap making sure you catch the cord with one of the stitches.  End off with a knot on the inside.  Repeat five times for the bottom level shapes.
  • Sew the remaining 6 shapes in the same way on into the cord with a 10 - 15cm space from shape on the end making sure to stitch top and bottom to the cord.  Slightly different space lengths give it a more random look.
  • Attach the 3 cords to the ring by folding them in half, placing the loop through the ring and pulling both ends through.
  • Once the paint is completely dry on the frame, wind each cord length around the frame twice, leaving about 15 - 20cm from the ring to the frame.
  • Attach a length of string to the ring so it can hang from the ceiling.

This is fun to make for your own baby.  Or make it as a gift for a baby shower or newborn.  There's something extra special about handmade gifts!