Saturday, February 23, 2013

Crochet Apple & Pear Cosies

WHAT YOU WILL NEED:
8 ply yarn
4mm crochet hook
Embroidery needle
Button
ABBREVIATIONS:
ch – chain
dc – double crochet
tc - treble crochet
rep – repeat
sl st – slip stitch
st – stitch

NOTE: These patterns use UK double crochet...shown here.
WHAT TO DO:

Variation 1 -

Start with a slip knot. Work 4 chain, join to form a loop with a slip stitch into first chain.
Round 1: 9dc into central loop, sl st into 1st chain to close up the circle.
Round 2: Working in the round, 2dc into each subsequent stitch (approximately 18 sts).
Insert a contrast colour yarn marker (3cm length of yarn positioned horizontally between the last stitch and the first one of the next round) at this point, this will allow you to see when you have completed a 'round' and stops you from worrying about counting stitches.
Round 3: 1dc into each st
Round 4: *2dc into next st, 1dc into following st*, rep from * to * until you reach yarn marker. (27 sts)
Round 5: rep Round 3
Round 6: rep Round 4 (40 sts)
Rounds 7-13: rep Round 3
When you reach the end of round 13, you need to begin working backwards and forwards rather than around and around. This will create the opening at the top of the cozy.
Round 14: ch1, turn the cozy and work in the opposite direction. 1dc into each st. Stop at the last stitch before the 1st chain.
Round 15: ch1, turn cozy,  *1dc in to each of the following 8 stitches, skip one stitch (i.e., miss a stitch between your previous dc and next dc)*, rep * to * until you reach the end of the row.

Round 16: (for apple cozy only ch10 to form a loop for the button, sl st into first ch), ch1 turn *1dc into each of the following 6 stitches, skip one stitch (i.e., miss a stitch between your previous dc and next dc)*, rep * to * until you reach the end of the row.

For apple cozy only cut the yarn and using an embroidery needle, work it into the back of the cosy. Sew the button to the cosy opposite the loop.

For pear cozy continue...

Round 17: ch1, turn cozy, 1dc into each st until you reach the end of the row.

Round 18: ch1, turn cozy,  *1dc into each of the following 4 stitches, skip one stitch (i.e., miss a stitch between your previous dc and next dc)*, rep * to * until you reach the end of the row.
Round 19: ch1, turn cozy, 1dc into each st until you reach the end of the row.

Round 20: ch10 to form a loop for the button, sl st into first ch, ch1 turn *1dc into next 3 of the following stitches, skip one stitch (i.e., miss a stitch between your previous dc and next dc)*, rep * to * until you reach the end of the row.

Cut the yarn and using an embroidery needle, work it into the back of the cosy. Sew the button to the cosy opposite the loop.

Variation 2 -

Start with a slip knot. Work 4 chain, join to form a loop with a sl st into first chain.
Round 1: 9dc into central loop, sl st into 1st dc to close up the circle.
Round 2: Working in the round, 2dc into each subsequent stitch (approximately 18 sts).
Insert a contrast colour yarn marker (3cm length of yarn positioned horizontally between the last stitch and the first one of the next round) at this point, this will allow you to see when you have completed a 'round' and stops you from worrying about counting stitches.
Round 3: 1dc into each st
Round 4: *2dc into each st until you reach yarn marker. Sl st into next stitch. (36 sts)
Round 5: Ch3, tc into each st until you reach yarn marker. Join round into top of ch3 with a sl st.
Round 6-8: rep Round 5. 
When you reach the end of round 8, you need to begin working backwards and forwards rather than around and around. This will create the opening at the top of the cozy.
Round 9: ch1, turn the cozy *1dc into each of the following 10 stitches, skip one stitch (i.e., miss a stitch between your previous dc and next dc)*, rep * to * until you reach the end of the row – don't worry if there aren't 10 stitches in the final group.
Round 10: ch1, turn cozy, 1dc into each st until you reach the end of the row.

Round 11: ch1, turn cozy,  *1dc in to each of the following 8 stitches, skip one stitch (i.e., miss a stitch between your previous dc and next dc)*, rep * to * until you reach the end of the row.

Round 12: (for apple cozy only ch10 to form a loop for the button, sl st into first ch), ch1 turn *1dc into each of the following 6 stitches, skip one stitch (i.e., miss a stitch between your previous dc and next dc)*, rep * to * until you reach the end of the row.

For apple cozy only cut the yarn and using an embroidery needle, work it into the back of the cosy. Sew the button to the cosy opposite the loop.

For pear cozy continue...

Round 13: ch1, turn cozy, 1dc into each st until you reach the end of the row.

Round 14: ch1, turn cozy,  *1dc into each of the following 4 stitches, skip one stitch (i.e., miss a stitch between your previous dc and next dc)*, rep * to * until you reach the end of the row.
Round 15: ch1, turn cozy, 1dc into each st until you reach the end of the row.

Round 16: ch10 to form a loop for the button, sl st into first ch, ch1 turn *1dc into next 3 of the following stitches, skip one stitch (i.e., miss a stitch between your previous dc and next dc)*, rep * to * until you reach the end of the row.

Cut the yarn and using an embroidery needle, work it into the back of the cosy. Sew the button to the cosy opposite the loop.


Pattern originally found here.

Wednesday, February 13, 2013

Crochet Baby Hat


Size: 0-3 mos, 6-9 mos, 12-18 mos
Finished Measurements: 35cm, 40cm, 45cm around
Materials:
  • 2 colours 8ply 100% wool
  • 6mm size hook
  • 5mm size hook
  • Tapestry Needle
Directions:
Hat
Rnd 1: With main colour yarn and 6mm hook, ch 3. Make 8 hdc in 3rd ch from hook. (8 hdc)
Rnd 2: 2 hdc in each st around. (16 hdc)
Rnd 3: (2 hdc in next st, hdc in following st) around. (24 hdc)
Rnd 4: (2 hdc in next st, hdc in next 2 sts) around. (32 hdc) SMALLEST SIZE ONLY, skip to straight section.
Rnd 5: (2 hdc in next st, hdc in next 3 sts) around. (40 hdc) MIDDLE SIZE ONLY, skip to straight section.
Rnd 6: (2hdc in next st, hdc in next 4 sts) around. (48 hdc)
Straight Section
Rnd 7: slip stitch into next stitch, ch 3 (this as first dc), dc in same stitch, ch 1, 2dc in same stitch, skip 3 stitches, (2 dc, ch 1, 2 dc) in next stitch, repeat from * to beginning chain. Slip Stitch to join at top of ch 3.
Rnd 8: Slip Stitch to ch 1 space, (ch 3, dc, ch 1, 2dc) in first chain 1 space, (2dc, 1 ch, 2dc) in each ch 1 space around. Slip stitch to join at top of ch 3.

Rnd 9 - 12: Repeat Rnd 8. Finish off.
Edge: Join using contrast colour between 2 shell patterns, ch1. *(dc, ch 1 in 1 chain space) 3 times, slip stitch into space between next 2 shell patterns, ch 1. Repeat from * around, making last slip stitch into beginning of round to close. Finish off.

Crochet flower
Rnd 1: Using contrast colour and 5mm hook, ch 5, join to form ring
Rnd 2: Make 10 sc into ring. Slip stitch into 1st sc
Rnd 3: (Ch 5, skip next stitch, sip stitch into next stitch) 5 times. Slip st into first stitch to join.
Rnd 4: Into loops made by chain (sc, 5dc, sc) 5 times to form petals. Slip stitch to join
Rnd 5: (At front of flower slip stitch between the two petals at the ring, ch5) 5 times.
Finish off, attach to hat with a button and weave in ends.
And you're done!

Wednesday, February 6, 2013

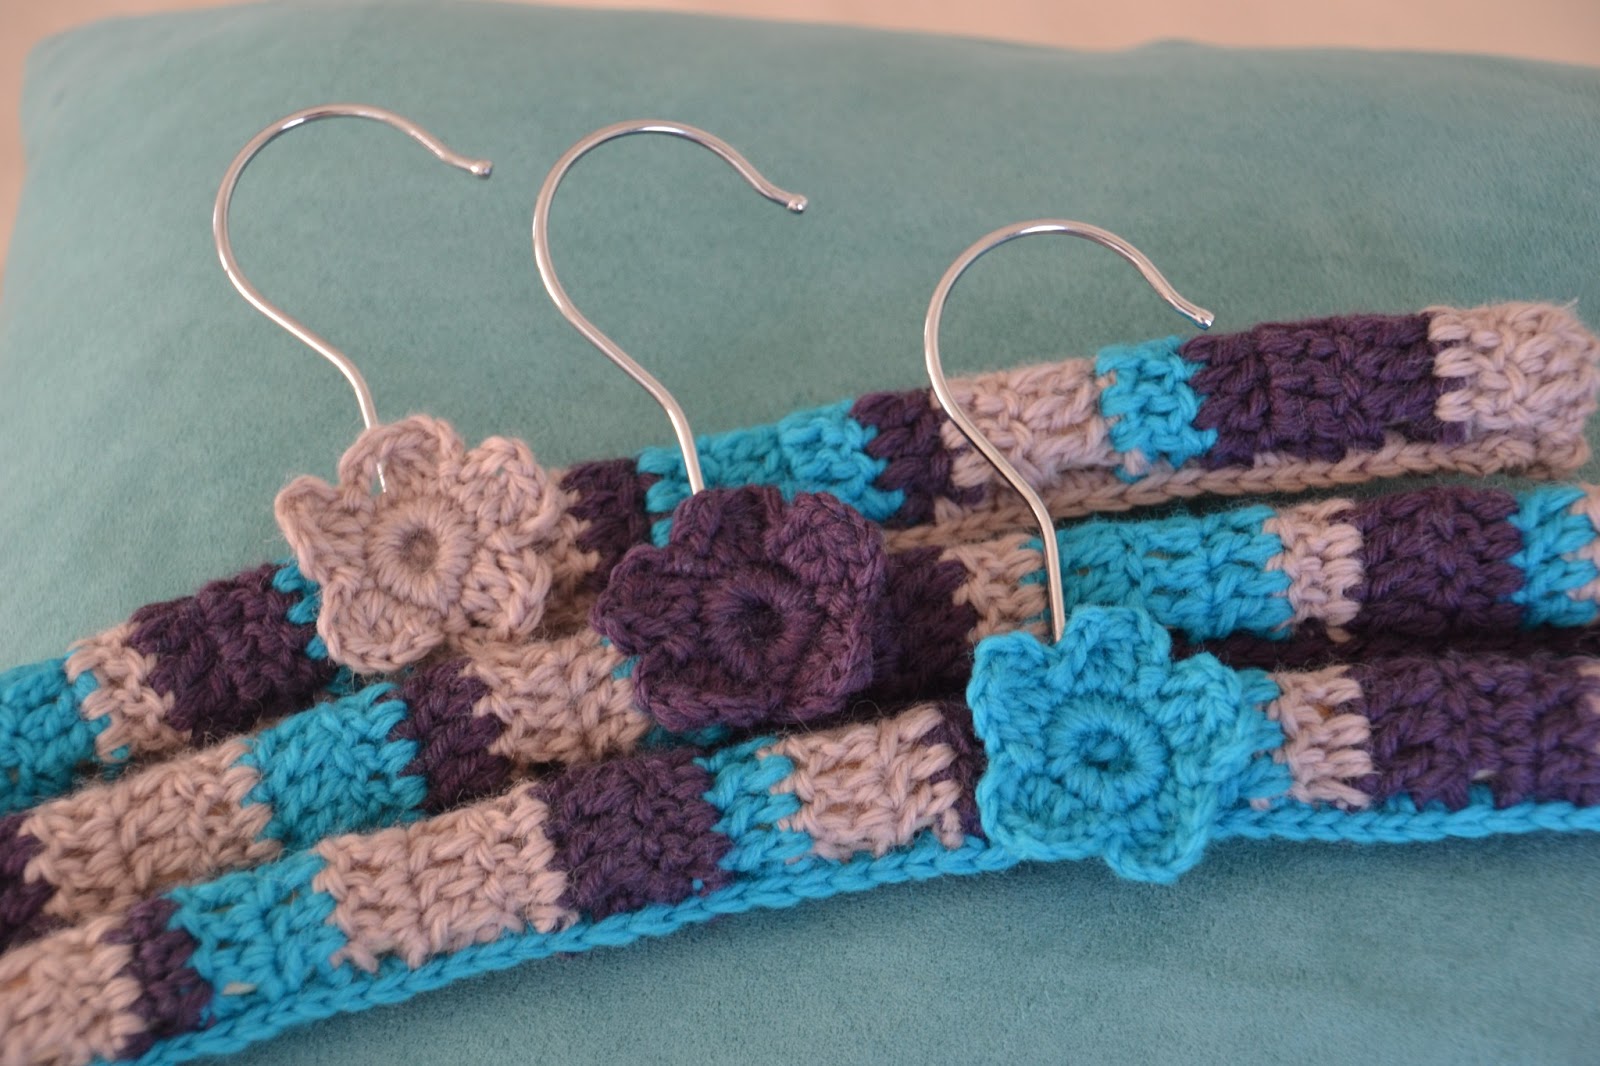
Covered Coat Hangers


I've been very busy lately making these for our school fete next month.
Which ones do you like best?
I've still got 8 to make...then I'm doing hanging hand towels.

I'm thinking I might make some of these for my Made It store...


Linking up today with

Trish @


for Wordless Wednesday

Tuesday, January 15, 2013

Knitted Cushion Covers

I have just sold these.
It was a lot of knitting (thank God for my air-conditioned bedroom!)
But I am so proud of them.
They've become one of my favourite things made by me.


Sunday, December 2, 2012

Sewing on Sunday

What have I been up to in the sewing room this week?
I'm, glad you asked. :)

No more peg pouches...yet.
I have bought the fabric for some more but I was busy finishing off peg aprons this week.
The very exciting news is that I sold five peg aprons to another mum at school for Christmas gifts from my Made It store...


These are the two new ones I made this week.

PicMonkey Collage
The smaller spot has sold, the larger spot is still listed.

I also made two too cute skirts for my Miss 5 from leftover fabrics.
Gotta love leftovers!!

025


Sew...what have you been up to in your sewing room this week?

Saturday, November 24, 2012

Sewing on Saturday

I did it, I did it!
I did some sewing today!!
And I'm sure it was only to get something up on this post.
See, it did work.

I made one peg pouch and I'm very pleased with it.
I cut my own pattern by modifying the peg apron.


080


I moved the straps from the sides to the top and made it narrower with only one pocket instead of two.

Now I can just tie it around my neck and sling it on and off whenever I need it.
Too easy!!

083
 
I can't wait to make more in different colours and fabrics.
Got any good suggestions?


Sew...what have you been up to in your sewing room this week?

Linking up with


Saturday, November 17, 2012

Sewing on Saturday

This blog has been very neglected of late.
And so has my sewing machine...hmmm I see a correlation here.

So I've decided to start a 'Sewing on Saturday' weekly post updating what I've been doing in the sewing room. That might motivate me to actually do something!
I hope...or this will be a very boring space.

I went to Lincraft this morning and purchased some fabric.
I haven't done that for ages, gee it felt good!
There's a new idea rolling around in my head. I want to modify my peg apron.

Peg aprons


I love my peg apron, but sometimes I'm too lazy to tie it at the back so I've taken to leaving it tied and slinging it over one shoulder. So it's become more of a 'peg pouch'.

And that is my new idea...a peg pouch.
I'm going to use this fabric, and hopefully it will all come together soon so I have something to show you next week!


Sew...what have you been up to in your sewing room this week?

Friday, October 12, 2012

Kids Utility Apron

Aprons aren't just for girls.
Oh no....

I made this for a friend's 9 year old boy.


Wednesday, June 20, 2012

Girls Scarves

After convincing my little Miss 4 to model for me again, I added some new girls scarves to my Made It store, Sew Thea, today. I love scarves, she loves scarves, it's sad it doesn't get cold enough here to wear them very often.

Here are the girls scarves in my store at the moment...


To visit my store at Made It, click on the button.

Saturday, May 5, 2012

Winner!

I gave my Miss 4 the honours of choosing the winner of the giveaway this morning.
She drew No. 14 out of that hat and that is......drum roll please.....


JO PRINCESS WARRIOR


Congratulations Jo!!
The Pale Pink Butterflies Peg Apron is coming your way soon.


Thanks so much to everyone who entered.

Saturday, April 28, 2012

Giveaway Time!

It's been too long since I've had a giveaway.
Mother's Day is only two weeks away, so it's the perfect time for a Sew Thea giveaway!

If you'd like to be in the running it's very easy, here's what you need to do...

1. Click on the Sew Thea button which will take you to my store on Made It.
2. Have a look at what's on offer. There are two pages, be sure to look at everything.
3. Tell me in the comments what your favourite item is...and you could win it!

(optional extras)
4. Follow me here on this blog or Facebook or Twitter (buttons on the sidebar).
5. Share this giveaway on Twitter, Facebook, your blog, or anywhere else.

Here's the button -


Click on it and happy window shopping.

Oh, and...GOOD LUCK! :)


PS You have until Friday 4th May, 7pm to enter. I'll announce the winner next Saturday, the 5th.


Wednesday, March 28, 2012

Neck Warmers - Cuffs & Cowls

I've been trying something new.
Neck warmers!
I have made two so far and I'm planning on making lots more because I love them.
They're a great variation on the scarf. They are easy to wear and don't have bits that get in the way.

This one is a cowl.  I knitted a ribbed rectangle about 70cm long by 25cm wide.
Then twisted it and sewed the short ends together.


And this one is another rectangle 73cm long by 11cm wide using the bobble yarn from Lincraft.
I made a button hole at the end and added a large button to the other end.


There are more to come but both of these are available on my Made It store Sew Thea at the moment.

Click on the button to check them out.

Saturday, February 25, 2012

Polka Dot Aprons

I have made a new batch of aprons for my shop on Made It.
I'm loving them!
I used this pattern...

Butterick 4945

...and made these...


Want one?
They're for sale here...
 Click on the button to see.


Wednesday, December 14, 2011

The Christmas Dress

My sewing machine has been working over time lately!
And for a 20-something year old basic little Janome, it's been doing a brilliant job.
I do love my sewing machine!!

After I finished the 9...nine...Christmas aprons, I had small piece of the gorgeous birdie fabric left to make a Christmas dress or skirt for my Miss 4. I needed to match it with some other fabrics but I knew that wouldn't be difficult because there are so many beautiful Christmas fabrics around at the moment. So I went to Lincraft and chose red spot, and red owl & hearts fabrics.


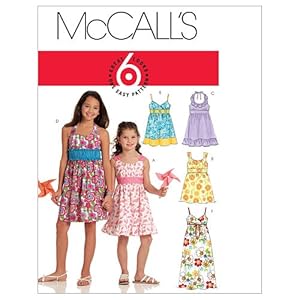
And Miss 4 helped me pick this pattern...

McCall's 5838
 I hadn't made a Christmas dress for her before...I know...slack mum!!
But I was excited about making this one.
It turned out I didn't have quite enough birdie fabric for the frill, so I added an extra red spot frill.
So, after cutting out 12 pattern pieces (I wouldn't call this an easy pattern) and spending all day sewing (I wouldn't call it quick either) I was very, very happy with the end result.


And so was Miss 4, who "really, really, really" loves it!


And today I think my trusty sewing machine (and I) need a rest!

Sunday, December 11, 2011

Christmas Apron Giveaway

I have a glut of Christmas aprons!
I couldn't help myself, I couldn't stop until I'd used every part of every piece of fabric!!
I have just enough birdie print fabric to make my Miss 4 a Christmas skirt or dress.

But here I am with 9...NINE...Christmas aprons.
There are 6 ladies aprons and 3 girls/small ladies aprons.


Red and White Christmas Apron
 
Birdie Christmas Apron with Ruffle

Red Polka Dot Christmas Apron

Birdie Christmas Apron
Polka Dot Christmas Apron with Birdie Trim

Red Polka Dots and Spots Christmas Apron

Red and Green Christmas Apron with Pockets - Size Small


Red and White Christmas Apron with Birdie Ruffle - Size Small

Red and White Christmas Apron with Red Ruffle - Size Small
 
They are all on my Sew Thea shop on Made It.
But I'm fairly certain I won't sell them all (if any) before Christmas.

Sew (see what I did there?)....I'd love to give one away to a lovely reader.
Just tell me which one is your favourite.
Give me a shout out on Facebook or Twitter, if you like.
Follow me here, if you can.
And you're in the running to win a Christmas apron valued at $20!

This is going to be the quickest giveaway in the history of giveaways, so I can get the parcel posted to the winner before Christmas.

12 hours is all you've got!!
It opens 8am this morning (Mon 12th), and I'll pick a winner at 8pm tonight (my time = Qld time)!

I hope you enter, tell your friends, and GOOD LUCK!